

I'm very new to Project Life/scrapbooking- so new that, in fact, I have not done a single layout yet! I'm the type of person who likes to be organised and let's face it- part of the enjoyment of crafting is organising your stash so why would scrapbooking/Project Life be any different?!
So this is how I've organised my stash to get ready to do Project Life. Obviously as I start the process, this is likely to change but this is how I've set up my stash.

Pretty much all my Project Life stash is stored in my Ikea black Raskog cart.

TOP LAYER OF CART
In the top layer of my cart is a 12x12" paper holder which holds pages-in-progress and some laminated guidance sheets; my Memorabilia storage box; Memorabilia folder and Project Life inventory file.

Laminated sheets- I got this printout from Elle who shared this really great idea of doing diagrams of all the page protectors. I'm hoping this will help me design my layouts so I laminated for quick reference.
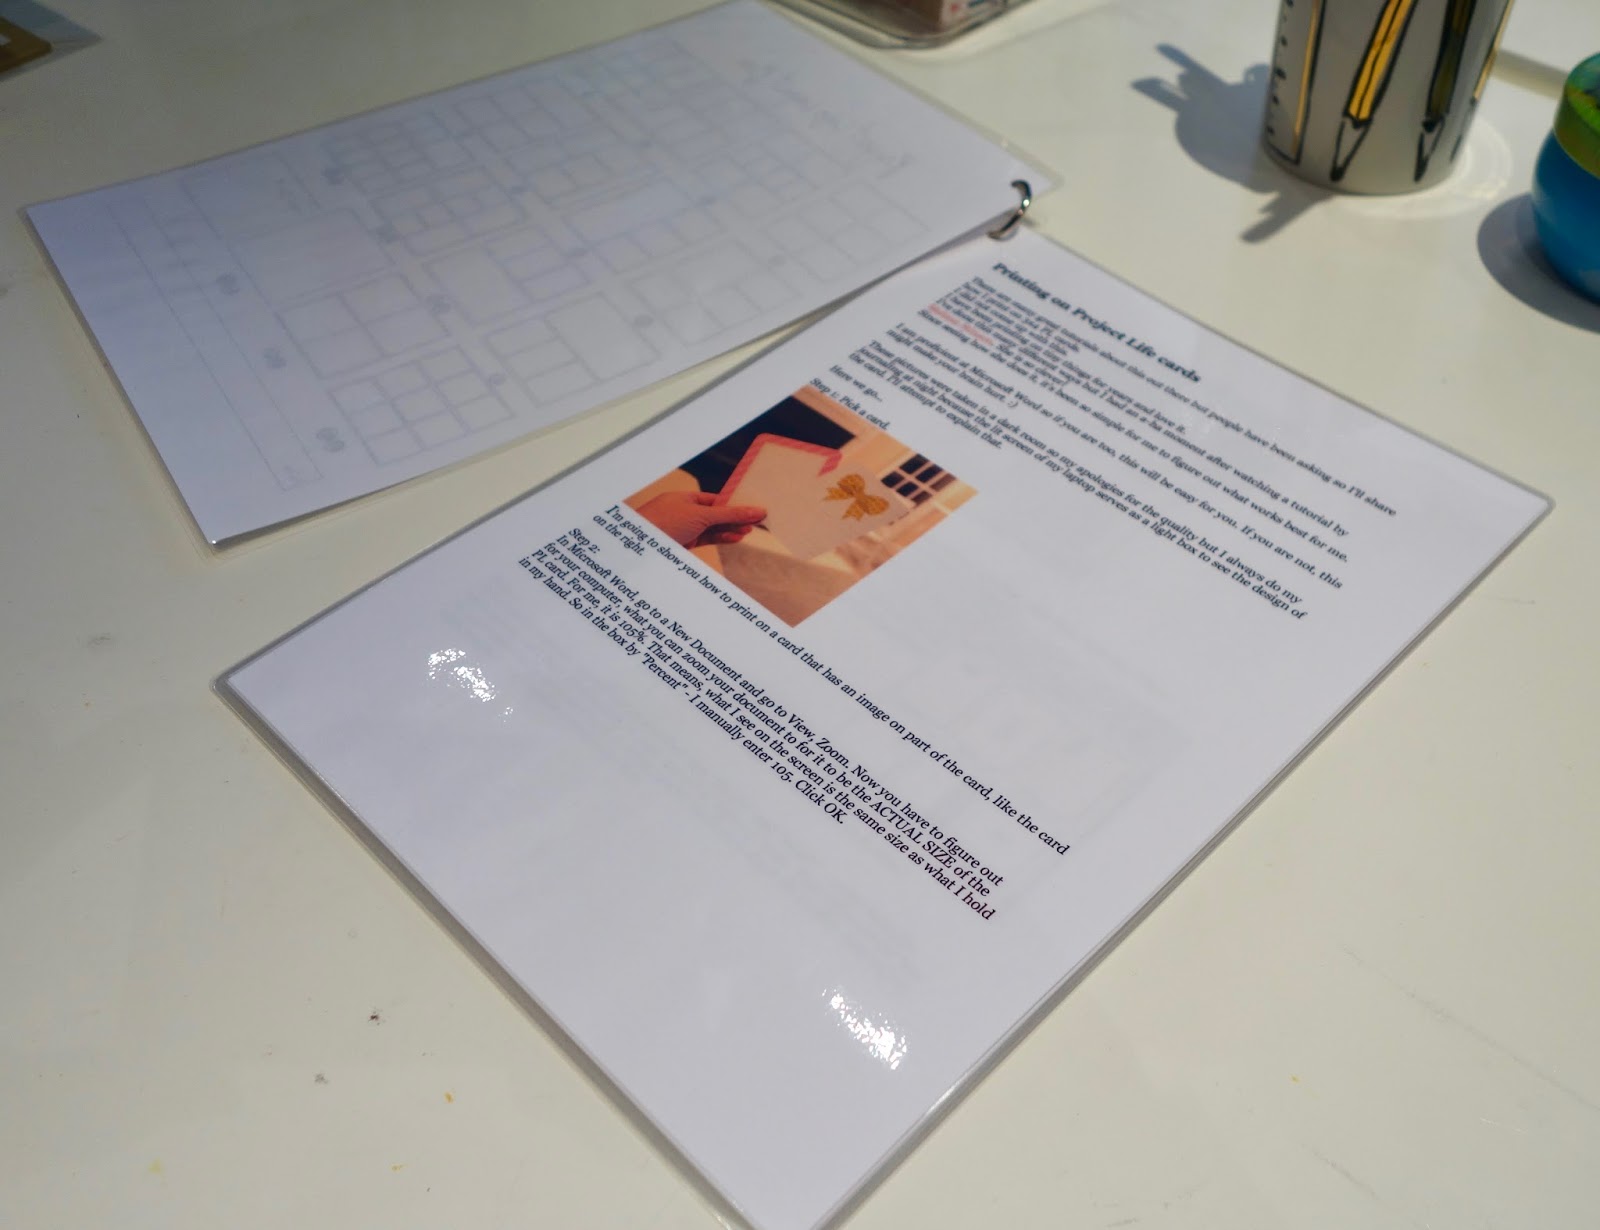
I also laminated Tracie's tutorial on how to print onto journal cards as I thought this would be something I would be doing a lot and a quick crib sheet would be useful.

I also got the idea of a Memorabilia folder from Elle who produced this super useful printout which she shared. I find this really useful as I have an absolutely hopeless memory. This way, I can keep an easy log of the little bits of everyday ephemera I might want to use in my layouts.

My memorabilia storage box very crude system but I simply got 12 hanging files and labelled them by month. As I get some ephemera I think I might want to use, I simply drop it into the correct month. My Project Life will be themed rather than doing anything by week or month so I thought separating it by month would be enough.

Here is an example of what is stored under October.

I already have a digi stamp inventory for my crafting stamps so thought one for Project Life would also be useful. I used a similar Simple Stories folder.


I have 2 sections in this file. At the front I keep a record of my Ali Edwards digital stamps/brushes. I've separated these out into the following sections: Birthday, Boy, Christmas, Halloween/Autumn, Outdoors, Summer. You will see from these categories (and stamp sets, scrapbook kits etc) that my Project Life will be concentrated purely on my lil boy.

The second section is just a simple inventory of physical journal card sets I own.

MIDDLE LAYER OF CART
The middle layer of my card holds photo boxes, a second memorabilia storage box, my journal card organiser and pencil case.

My second memorabilia box is a thicker one from Paperchase I use for storing more bulky items so they don't take up too much space in the hanging file box. Useful for the little bits a toddler makes!!

My journal card organiser I got from Etsy. As usual, I made dividers using these. I divided up my cards into the following sections: Adventure, Birthday, Boy, Halloween, School, Summer and Zoo.
At the moment my pencil case just stores some Becky Higgins PL journalling pens.

BOTTOM LAYER OF CART
The bottom layer holds my 12x12" scrapbooking kits, my stamps and dies and blank journal cards.

I store my stamps and dies together in Ikea containers using my usual pockets and inserts. I separate them using these dividers into these categories: Boy, Days & Months, Family & Kids, General, Journal Cards, Seasons & Holidays, Travel & Adventure.

I store spare pocket pages in my white sideboard and my Canon Selphy on the top. I store my album on my main Ikea shelf.


No comments:
Post a Comment