I've saved my old craft room tour here so you can view then compared to now and see the changes I've made.
I'm so happy to show you my little crafting haven! We moved into our house 2 years ago and my craft room (formally the smallest bedroom plus ensuite) has been an ongoing project for me- tweaking and tweaking til I have finally got it perfect! For me, it was really important that my craft room be as functional as possible- I wanted easy access to what I needed- but also wanted it to be visually pleasing and inspiring. I think I've achieved that. I love to come and just be in this room, it really is my escape from the world. I hope you love it as much as I do.
So here was my room when we first moved in. You can spy the ensuite through the doorway.
And here is the back wall with the door to the right. At this point, I was testing what blue I wanted to paint the walls!
And here it is all finished!
As you come in the door, on the left hand side is a large fitted wardrobe. This stores my papers for work, painting supplies and just general personal stuff. Then this is the view slightly to the right with my desk in the centre of the room.
This desk is where I do my blogging, surfing and colouring. I love to be able to look out onto the wonderful view that I have. I have the Liatorp desk and Volmar Swivel Chair, both from Ikea. The basket on my desk (from Ikea) holds office supplies and my paint brushes and fine liners. My desk light is an Ott Light purchased from here which I find is fantastic for colouring, especially when the weather is dull.
This desk has two cupboards either side- the left hand one holds my card blanks and envelopes and the right hand one holds my punches, brush markers and various mats, scoring board etc.
To the right of my desk is one of my mini stackers from Storage 4 Crafts where I store my embellies. These are great as you can basically design your own storage unit. I chose to have 9 of the 1" trays and 5 of the 2" trays. In the 1" trays I have my embellies stored my colour. I used to store by type of embellie but found that this wasn't useful to me. When I make a card, I always reach for embellies by colour to see what matches. It took me AGES to reorganise these but it was worth it.
The 5x 2" trays hold pearls and gems, rub-ons and other sentiments eg Craftwork Cards' sentiments, chipboard and diecuts, various types of white card eg thicker card for making card blanks, stamped images.
Here is the view to the left hand side of my desk (you can see the edge of my fitted wardrobe). In the far left hand corner is my photographic studio and my display area.
Here is where I photograph my cards for my blog. I have another smaller Ott-lite here.
Above my photographic area is my display area (see my stamping studio bit for info on the shelving). This is where I display the cards I have most recently made before they move over into my "cards made" storage box. As I mentioned before, one of the most important requirements for me for my craft room was for it to be inspiring and be visually pleasing. I love that I can display my most recent cards- better than putting a picture on the wall, eh?!
Here is the wonderful view from my desk! It's surprising I get any work done!!
In the far right hand corner is my sewing and cutting area. The desk and chair are a bit old from my dear old Dad's office. I am also very lucky to have a tv up on the wall. I like to have this on for company sometimes whilst I'm crafting.
Again, I think this cotton reel holder is so visually pleasing- much better than storing your reels in a tin in a drawer. The holder I got from JoAnn's in the US whilst I was on holiday.
This sign is above my sewing/cutting area. These letters I also got from JoAnn's.
Now I'm very very excited to show you my stamping studio!! If you look at the very first photo on this post, you can see that I did my craft room in 2 stages and that for a while this was an ensuite. Here it is before work started!
And here it is all stripped out and plastered!
And ta da....!!! Here is my little stamping studio!
This is the view as you enter - my desk is to the left.
I have a stamping desk at one end. This is where I do my stamping and actually make my cards. My father in law made the desk out of a kitchen worktop. I don't have a chair in here as I like to make my cards standing up.
On the wall above my desk is my Stamping Bella Craftybella decal. Doesn't it look fab?! I decided to jazz it up by glueing a load of buttons onto the wall so that they appear in the jar.
Underneath the desk is my stamp supply storage. This is the Alex Drawer Unit on castors from Ikea. The top drawer stores my ink pads. I have a 2" inserts (the same as used for my embellie storage) for my Stampin Up ink pads and they also hold a corresponding dauber so I don't get the colours mixed up.
Second drawer holds more Stampin Up pads and also embossing powders, gun and cleaning stuff.
I do store some stamps in here. I have a couple of drawers holding sentiment stamps. The white A4 paper clipped with the yellow clip is how I organise my sentiments for easy access. I will do a more in-depth post about that another time.
I also store some of my stamps that I don't use very often here.
On the left hand wall above my desk is my die storage. I used to store my dies in a cd holder but I found that I really like to be able to see all my dies at once when I'm deciding what to use. This board is basically made out of a white board I got from Rymans and then I bought some heavy duty metallic sheeting off Ebay and stuck it on. It works brilliantly. Now you can have a nosy and see my entire die collection!!
On the right of my desk is my tool storage where I basically store anything I need to make a card!! I got this from the Great Little Trading Co. Above that are my holders for stamping card. Again- I got these as I like everything I need to be immediately accessible. The smaller holder on the right is for scraps of card which I use for stamping sentiments on.
As you turn around from my desk, the main stamp display faces you.
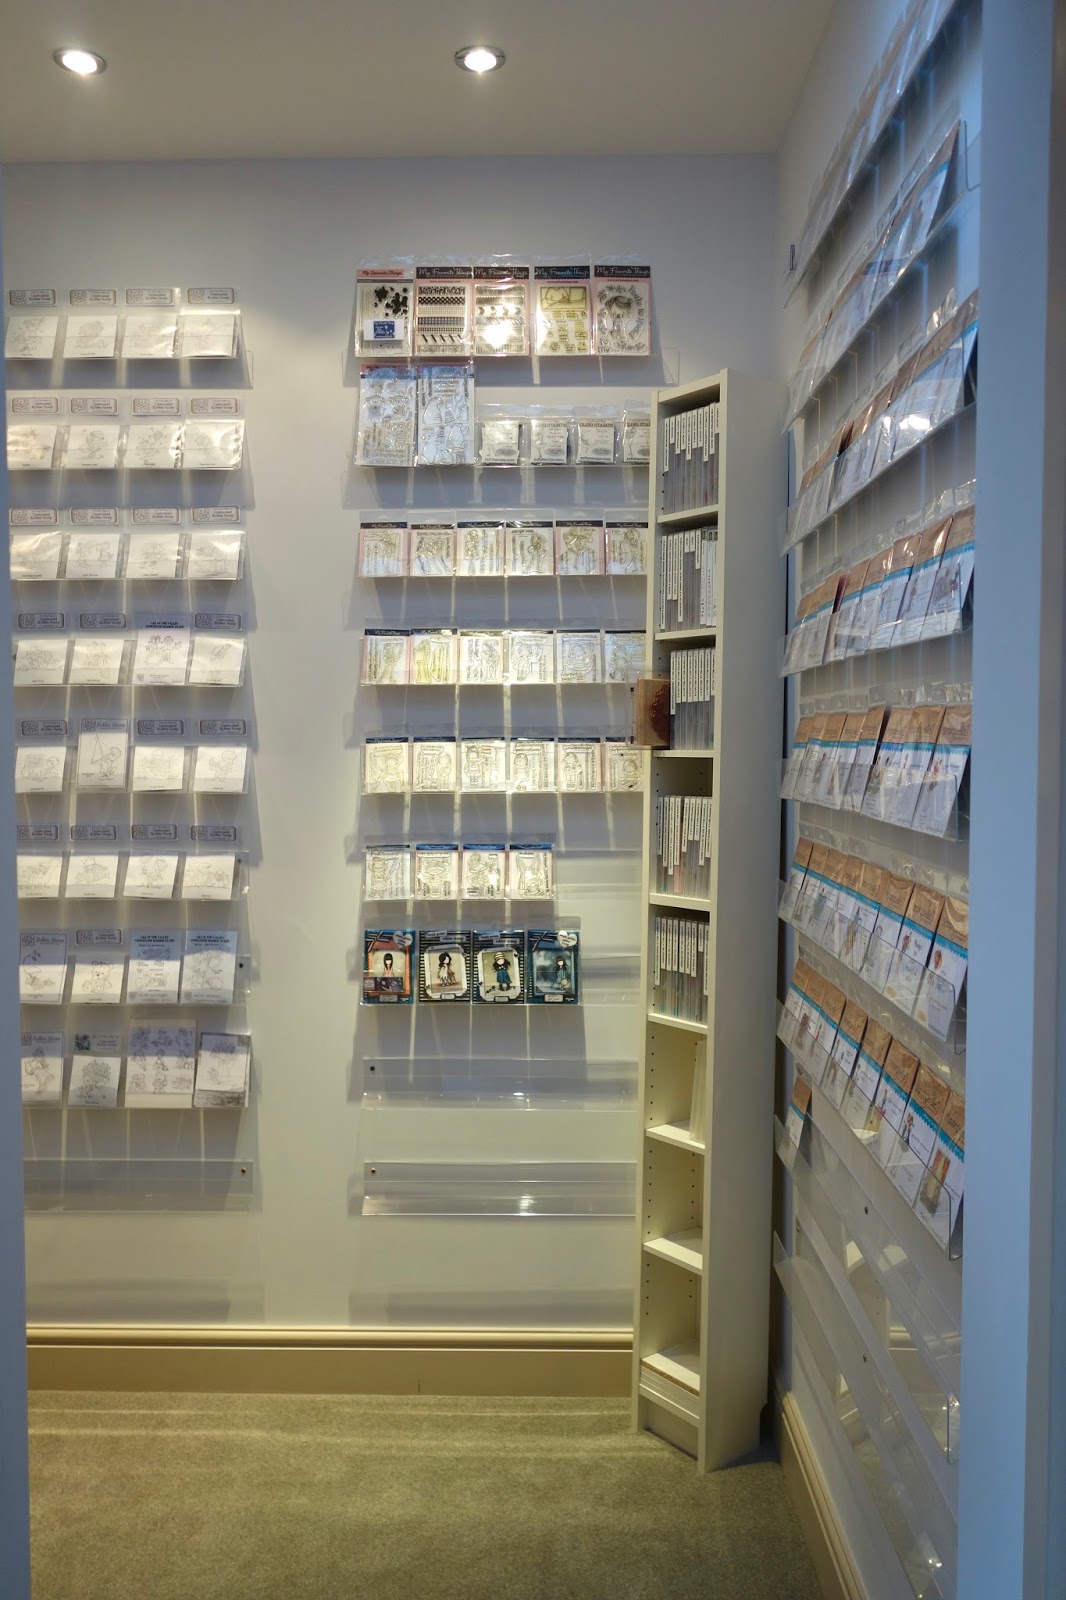
The idea of storing my stamps like this came from my hubbie would you believe?! He said "wouldn't it be fantastic to have your stamping area like a stamp shop with all your stamps on display?" This so fitted in with my idea of a visually pleasing craft area, what was a girl to do???!!! I literally spent weeks researching the perfect shelving for this area and eventually found these clear, acrylic display shelves normally used for conferences and shop display areas. I got all the shelving (including my card display shelving) from 3D Displays.
I store my stamps by manufacturer except for Christmas ones which are a complete mish mash of all manufacturers together. The display at the back holds my Papertrey Ink, Stamping Bella (let's face it, mainly Stamping Bella!), MFT and Sarah Kay stamps.
I even bought shelf label holders and made up my own shelf labels!
And here is MFT and Stampavie.
Here is my other shelving. (I'm having a bit of a reshuffle with my stamps at the moment so some of it looks a bit messy and not all of the ones I want out are out). It took me a long time to work out the shelving heights and widths so that I could fit in all my stamps from thick wooden ones to tall clear ones. I also like to make cover sheets for all my stamps which don't come in packaging eg Riley, Whipper Snapper Stamps and rubber Elzybells stamps all came loose with no packaging so I stamp them out, add the name of the stamp and then store them in a sealable plastic jewellery bags (hopefully you can see that on the lower 3 rows on the right hand column).
My wooden stamps store nicely and because the shelves are clear, you have no problems seeing small stamps.
My Christmas stamp storage is to the left as you walk in the room. See, there is room for more Christmas stamps??!!
To the right of the entrance to my stamping room is this little corner. At the top I have my Bind-It-All machine and some packets of wires. Below that are my small Ikea jars filled with flowers. Below that are my larger Ikea jars filled with ribbons. The left hand drawer in the upper shelf has Bind-It-All supplies in and the right hand drawer has miscellaneous stuff that I don't use very often- often freebies from magazines etc.
Recognise this?!! I had my blog header made into a canvas so I could display it on my wall.
Mmm, lots of lovely ribbons stored in jars from Ikea.
Below the shelves are my card and paper storage units from Storage 4 Crafts. The unit on the left is for card and the one on the right is for 12x12" paper. I used white round stationery stickers coloured with copics to denote the colour of each tray.
The gorgeous wire cake stand I got from Ebay and contains glitter, Liquid Pearls and a few H20s.
On the card storage unit, I store my copics and watercolour and lyra pencils. I have found these amazing baskets which do the job of separating out my colours perfectly. They are actually dishwasher cutlery baskets I found on Ebay. I searched and searched for just the right thing and these are perfect! Behind you can see my colour guide which I refer to here.
Along to the right of that is my large Ikea Expedit unit. This sits directly behind my desk.
From top left to right I store- general craft books; Big shot; made cards box; beads; cardmaking books; embossing folders (in blue record box); iTop brad maker & hot fix crystals; more beads; craft magazines; Sizzix dies; Christmas supplies; made Christmas cards & new stamps (I ration myself when I do a big order!); 6x6" paper pads; paper scraps; altered items box; material & felt box.

Finally to the right of my large unit is my coloured images display. At some point, I'll do a post about how I go about making my cards but an important stage of this uses this display which is made of Asker rails and clips from the kitchen range at Ikea. As you know, I love to colour so I will often colour a number of images at a time. Because I never colour an image without knowing what papers I'm going to use, once I've coloured an image I like to store it with the corresponding papers until I am ready to make a card. So you see here I store the papers and coloured images in clear scrapbooking files and then attach them to a rail with a clip. I love crafting this way as I always have an image ready to use and I find it really helps me get organised with my DT work as well.
So that's the end of my craft room tour! I hope you've enjoyed visiting! x